|
|
How to replace the rear diff. mount Disclaimer Please note that I am not a mechanic by trade and that I nor Turbocelica.nl can be held responsible for any damage, injuries or death caused by work you perform using this website as a guideline. Parts and tools needed Replacement rear differential mount Basic socket set Tipp-ex or other marker Pry bar WD-40 Access to a car lift and help of a friend would be nice and make this job easier.  Locate the diff. mount Here you see the rear end of the car. The differential mount is held in place with six bolts - four which bolt it to the sub frame of the car (red) and two which bolt it to the diff. case: 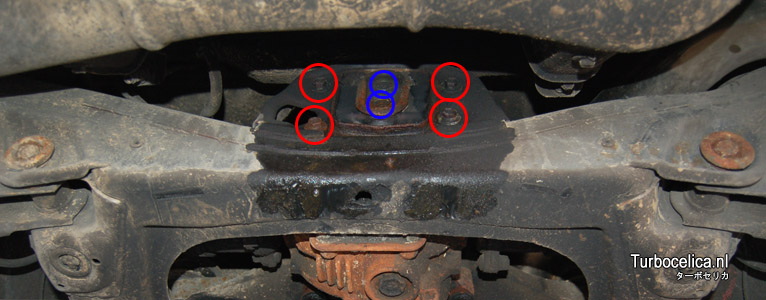 Remove the cross member by removing the four bolts holding it to the sub frame (green). You might have to soak them in WD-40 first, like me. Next up, unbolt the six bolts on the rear of the diff. (red and blue): 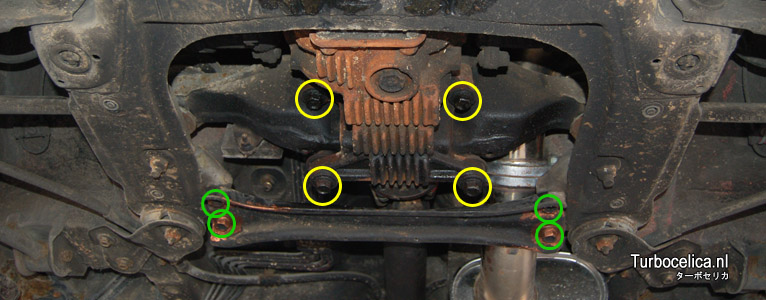 Now you can undo the last four bolts holding the diff. to the frame (yellow). I noticed the holes in the diff. are significantly larger than the bolts which go through it, so to prevent any possible vibrations/stress in the drive train I marked the diff. casing - better safe than sorry.. 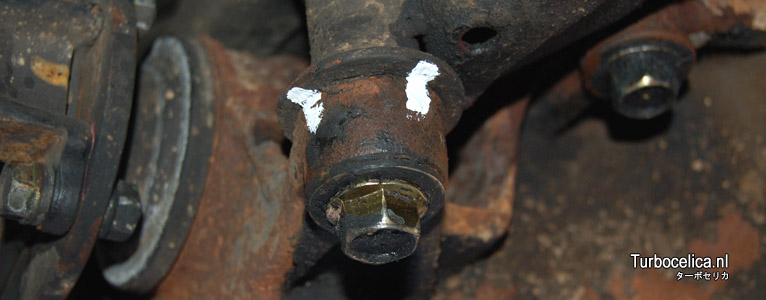 Now you can gently lower the diff. and push it towards the front of the car. With the help of a pry bar and a friend I could wiggle the old mount out and slide the new one in. The rest is a matter of bolting everything up again. Check all bolts again before you lower the car. Job done!  C-One Sports Diff. cushion How to.. Top |
|
|